1
Log in to your account
Head over to https://rxresu.me and log in with your account credentials.
2
Open the Resumes Dashboard
After logging in, navigate to your Dashboard where all of your resumes live.
This is where you can create, import, organize, and manage multiple resumes for different roles or versions.
3
Click “Create a new resume”
In the Resumes Dashboard, click on the Create a new resume card to open the creation form.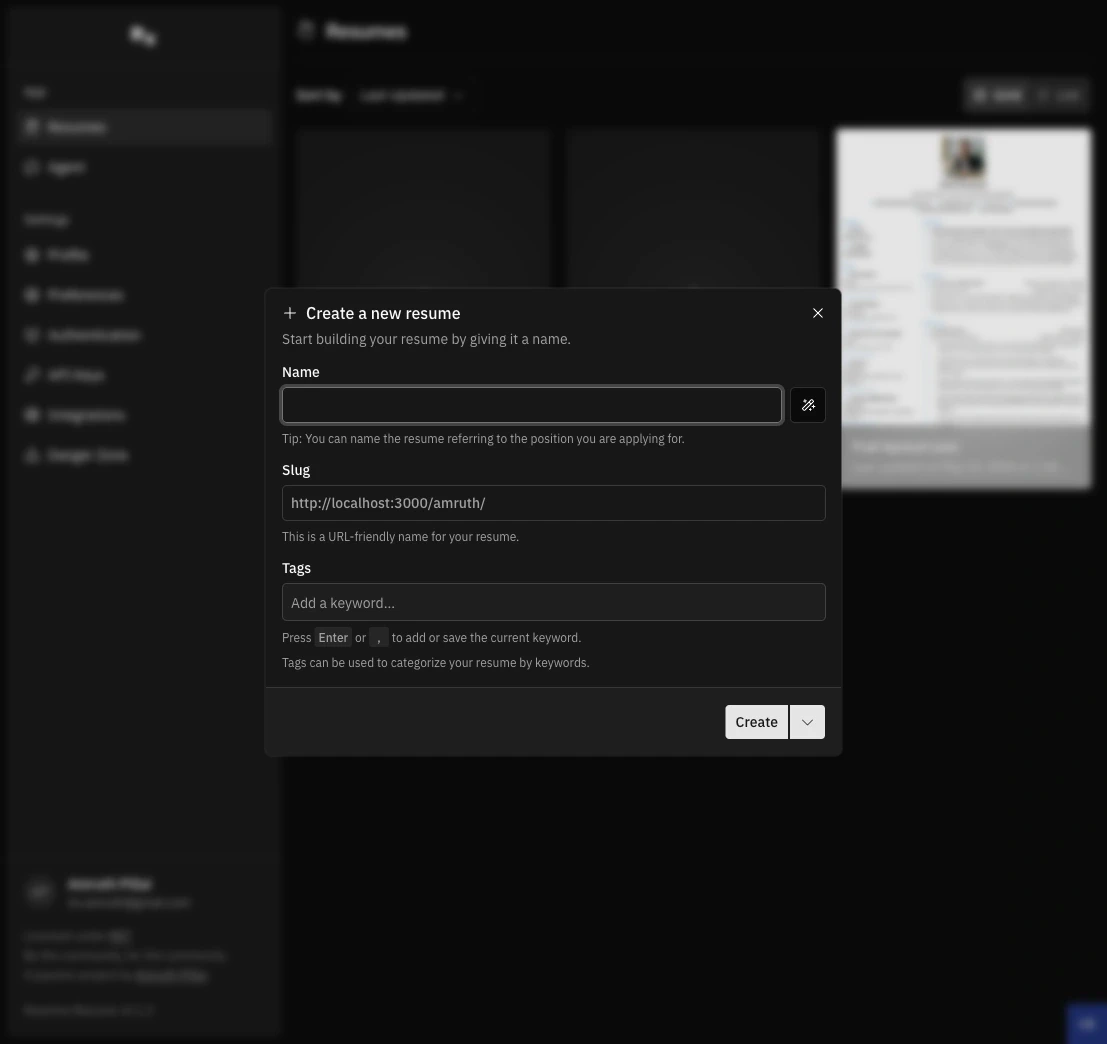
Create a new resume dialog
4
Name your resume
Fill in the resume name. This can be a generic name (e.g., “General Resume”) or something tied to the position you’re applying for.
5
Review (or edit) the slug
The Slug field is auto-filled based on the name, but you can change it to anything you like.
6
Add tags (optional)
Add any Tags you want. Think of tags like folders or labels to help organize many resumes.
You can filter resumes by tags later from the Dashboard. The tag filter appears after you have at least one tag.
7
Choose a blank or sample resume
Click Create to start with an empty resume, or open the split-button menu and choose Create a Sample Resume to start with sample content.
8
Open the resume in the builder
Once created, a new card for your resume will appear on the Dashboard. Click it to open the resume builder and start editing.
What you can do next
After creating your first resume, you can:- change the template in Choosing a template;
- adjust the page format in Selecting the right page format;
- download a copy in Exporting your resume;
- organize, duplicate, lock, or delete resumes in Managing resumes from the dashboard.