

How the layout works
- Pages. You decide which sections start on which page. If a page’s sections don’t fit, the rest runs onto an extra page; see Fitting content on a page.
- Main and sidebar. On a two-column template, the sidebar prints as its own narrow column. On a one-column template, sidebar sections print after the main sections.
- Print order. In Write, the list of sections shows them in the order they print: page by page, the main column first and then the sidebar. Dividers mark where each page and each sidebar starts.
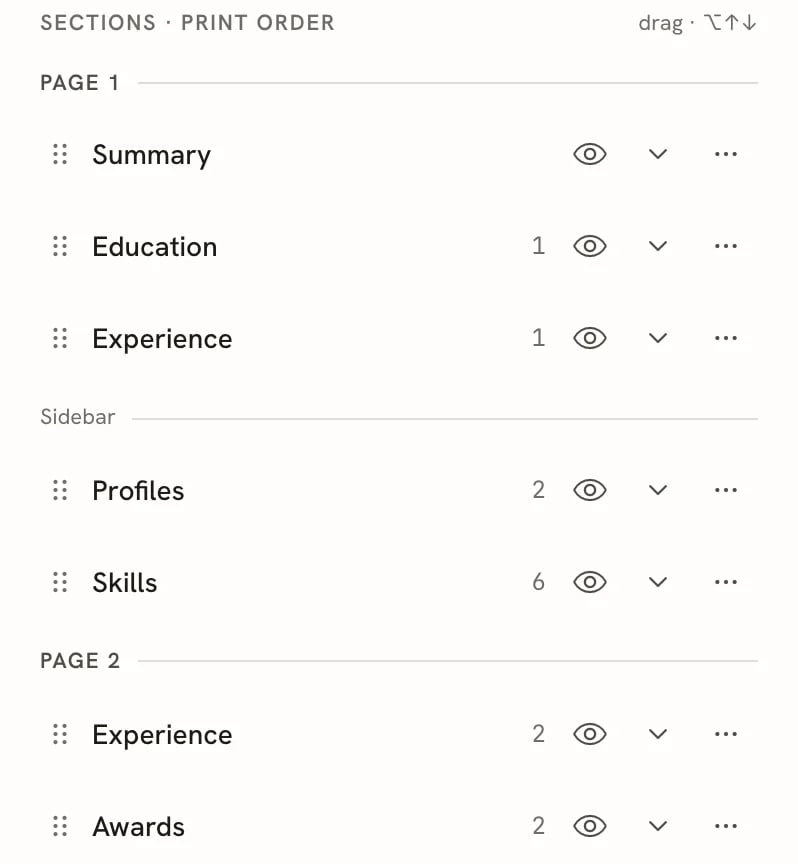
Write lists sections in print order, with dividers for pages and sidebars
Move the sidebar and change its width
On a two-column template, a Sidebar panel appears under the template gallery in Design → Template.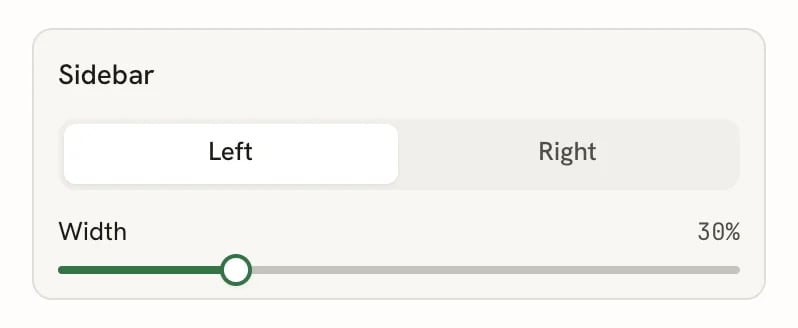
The Sidebar panel under the template gallery
- Left / Right puts the sidebar on that side, whatever the template’s usual side is.
- Width sets the sidebar’s share of the page, from 10% to 50%.
Reorder sections and move them between columns
In Write:- Drag a section by its handle (the dotted grip on the left) to a new place in the list. Dragging it below a Sidebar divider moves it into the sidebar; dragging it past a Page divider moves it to that page.
- Or focus a section’s title and press ⌥ ↑ or ⌥ ↓ (Alt ↑ or Alt ↓ on Windows and Linux).
- Or open the section’s ⋯ menu and select Move up or Move down.
Manage pages in Advanced → Layout
Advanced → Layout shows every page as a box with its Main and Sidebar columns. Open Advanced at the bottom of the Design panel to find it.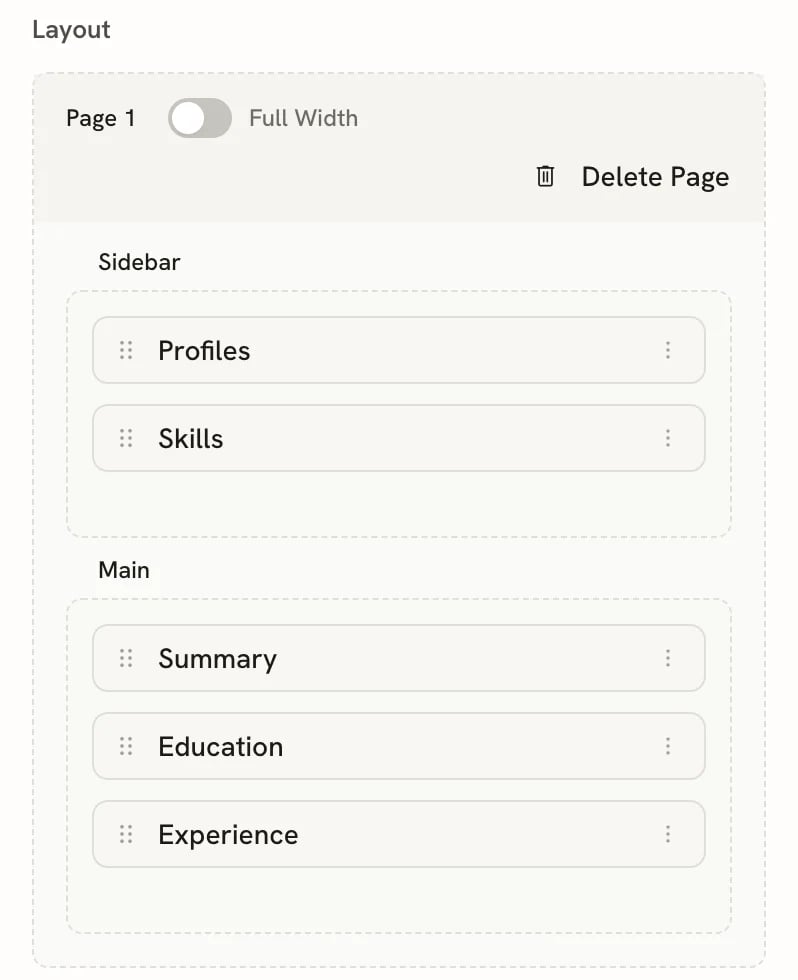
A page in Advanced → Layout
- Drag sections between columns and between pages.
- Select Add Page (below the last page) to add an empty page.
- Select Delete Page to remove a page. Its sections move to the first page (or to the second page, if you delete the first). You can’t delete the only page.
- Turn on Full Width to print that page in a single column. Its sidebar sections move into the main column.
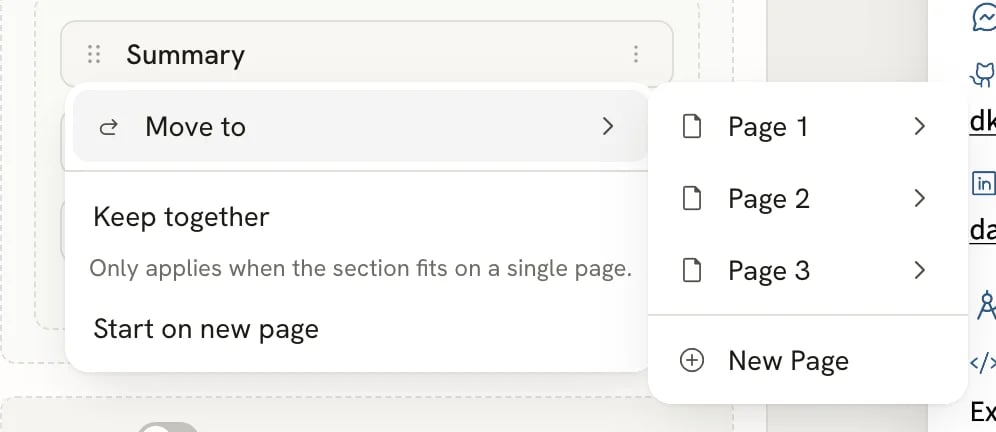
A section's menu in Advanced → Layout
- Move to → a page → Main or Sidebar moves the section there. New Page moves it onto a page of its own at the end. Sidebar isn’t offered on full-width pages or with one-column templates.
- Keep together and Start on new page control page breaks, described below.
Show a section’s entries in columns
Short entries, such as skills, languages or interests, can sit side by side. In Write, open the section’s ⋯ menu, point to Columns and choose 1 column to 6 columns.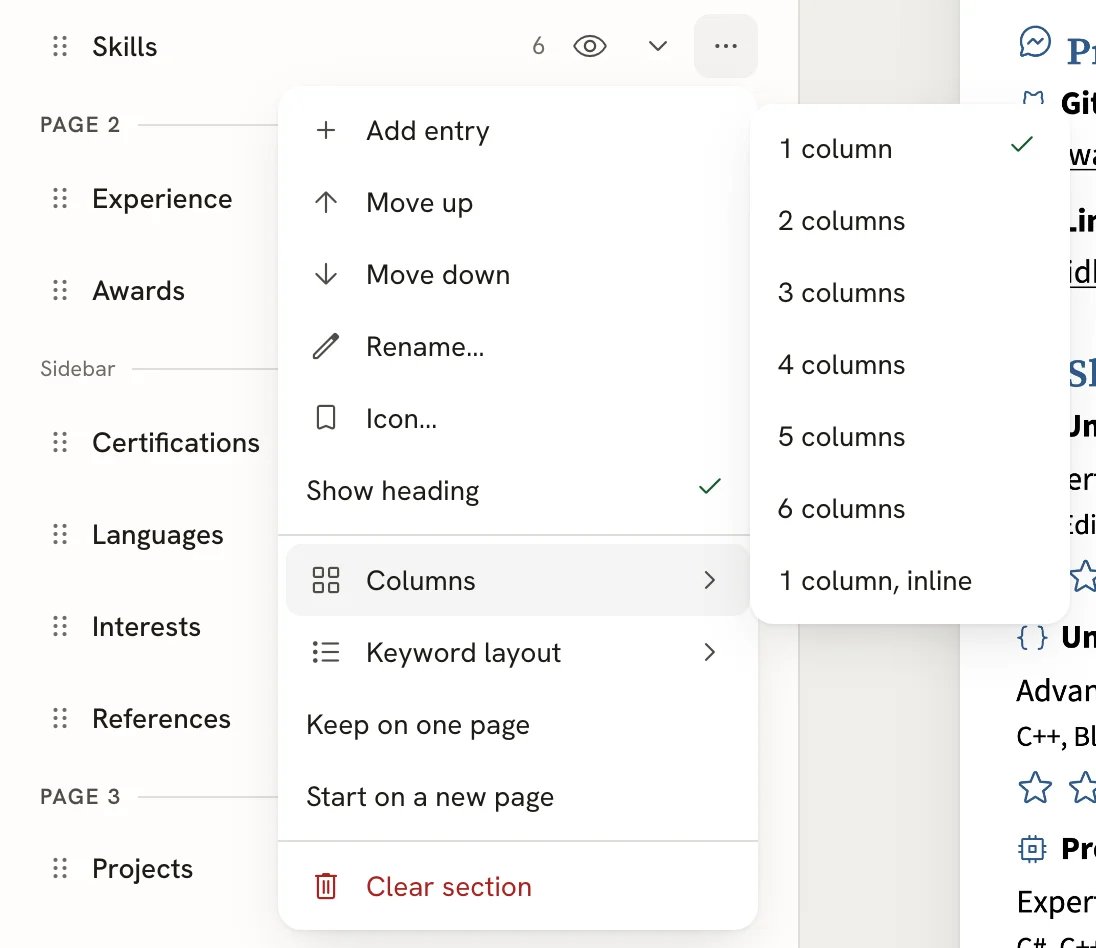
The Columns submenu in a section's ⋯ menu
- 1 column, inline runs skills together on one line instead of stacking them.
- Keyword layout shows each skill’s keywords Inline (on one line) or as a Bulleted list.
Control page breaks
Two switches decide how a section behaves at the end of a page. You find them in the section’s ⋯ menu in Write and in its ⋮ menu in Advanced → Layout; both places change the same setting.Related guides
- Choosing a template: one- and two-column templates.
- Managing sections: add, rename, hide and remove sections.
- Fitting content on a page: keep to the pages you planned.