

Import applications
1
Open Import from CSV
In Applications, select the import/export button (the two arrows next to Save job), then Import from
CSV…. If you have no applications yet, select Import from CSV on the empty page.
2
Add your rows
Select Upload .csv to choose a file, or paste rows into CSV data. The first row must be the column headings.
Select Use sample to see an example.
3
Check the column matches
Under Columns, each heading from your file points to the field it goes into. Reactive Resume matches common
headings automatically. Change any match with its menu, or choose Leave out to skip a column.
4
Review the summary
The summary says how many applications are ready to import, and how many rows or contacts will be skipped. Invalid
stage, stage-date or posting-source values are listed by row; correct them or choose Leave out for that column
before importing.
5
Import
Select Import n applications. They’re added to your Applications right away.
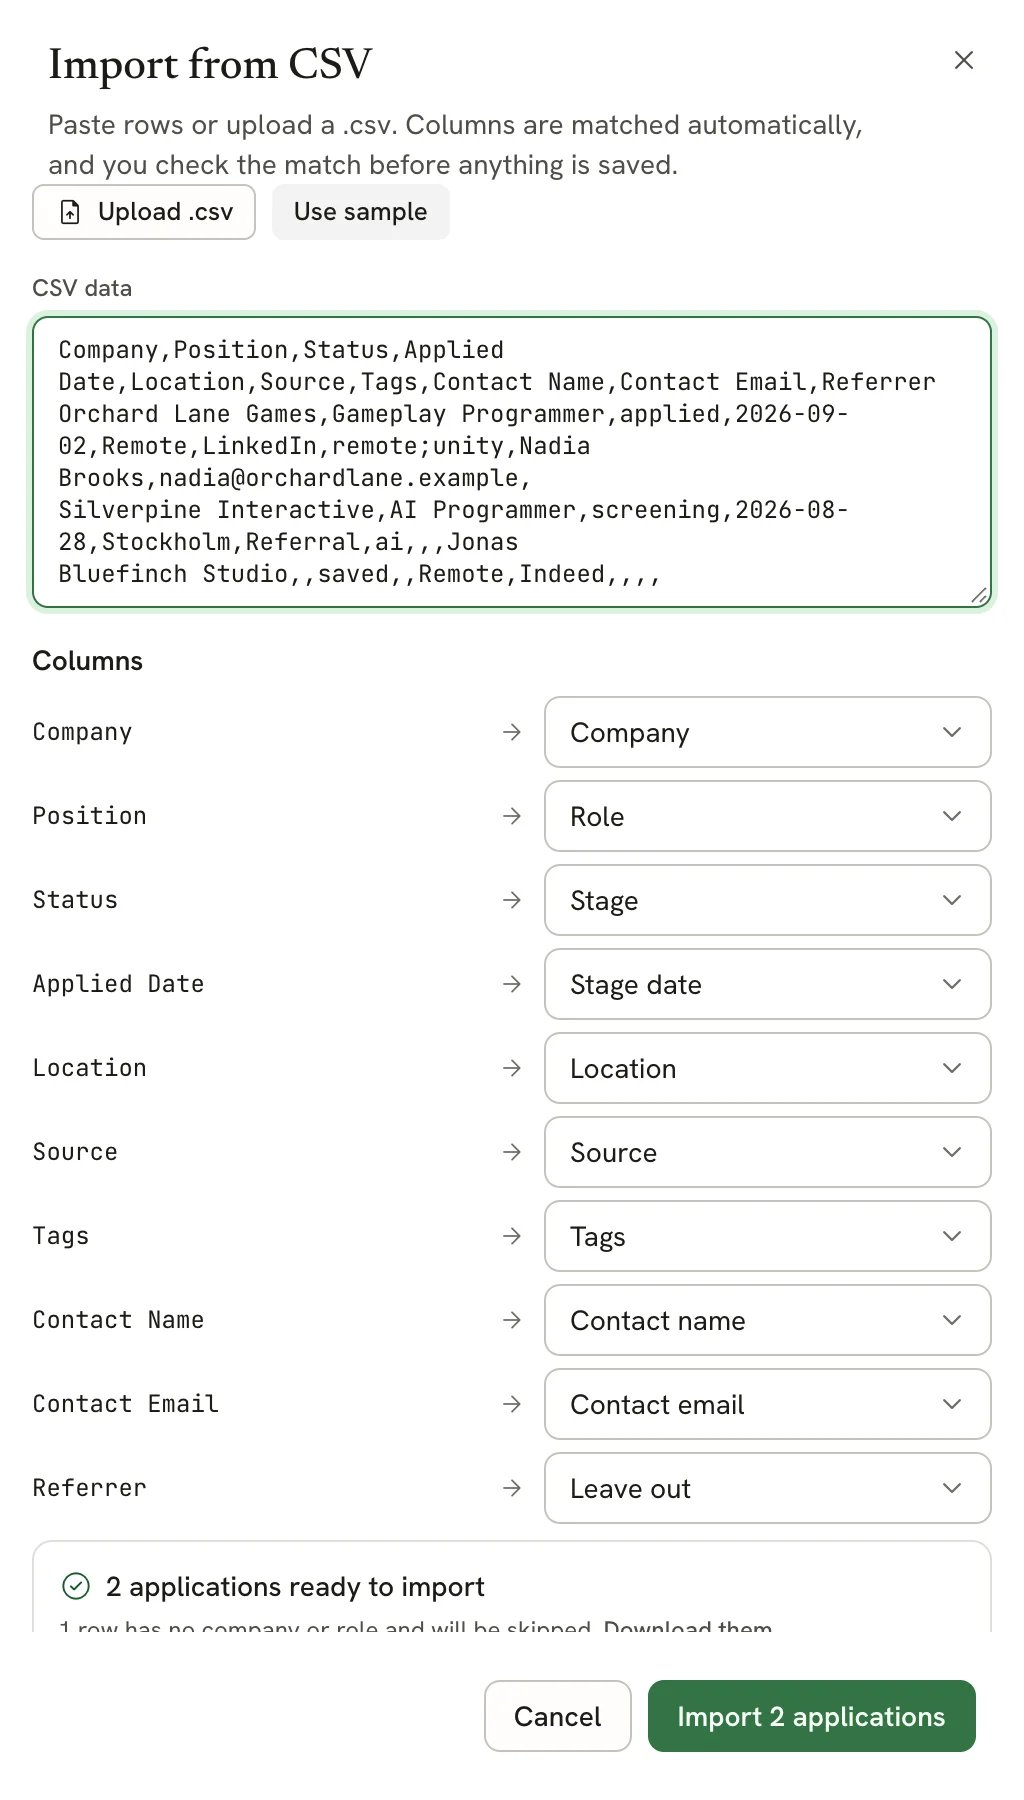
Columns matched automatically, with an unknown column left out
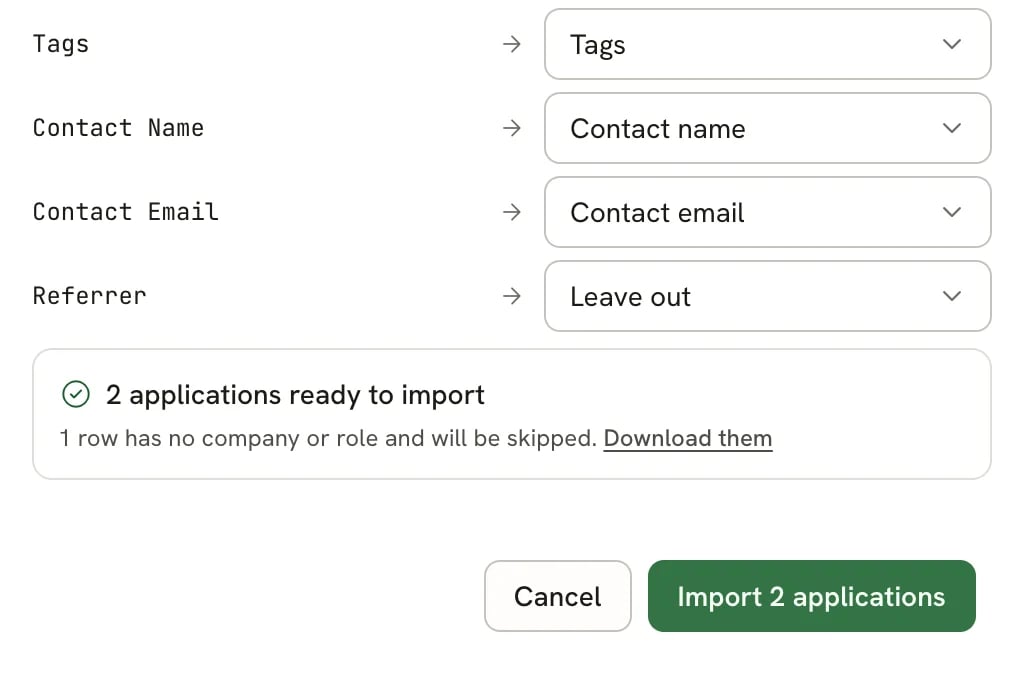
The summary before importing
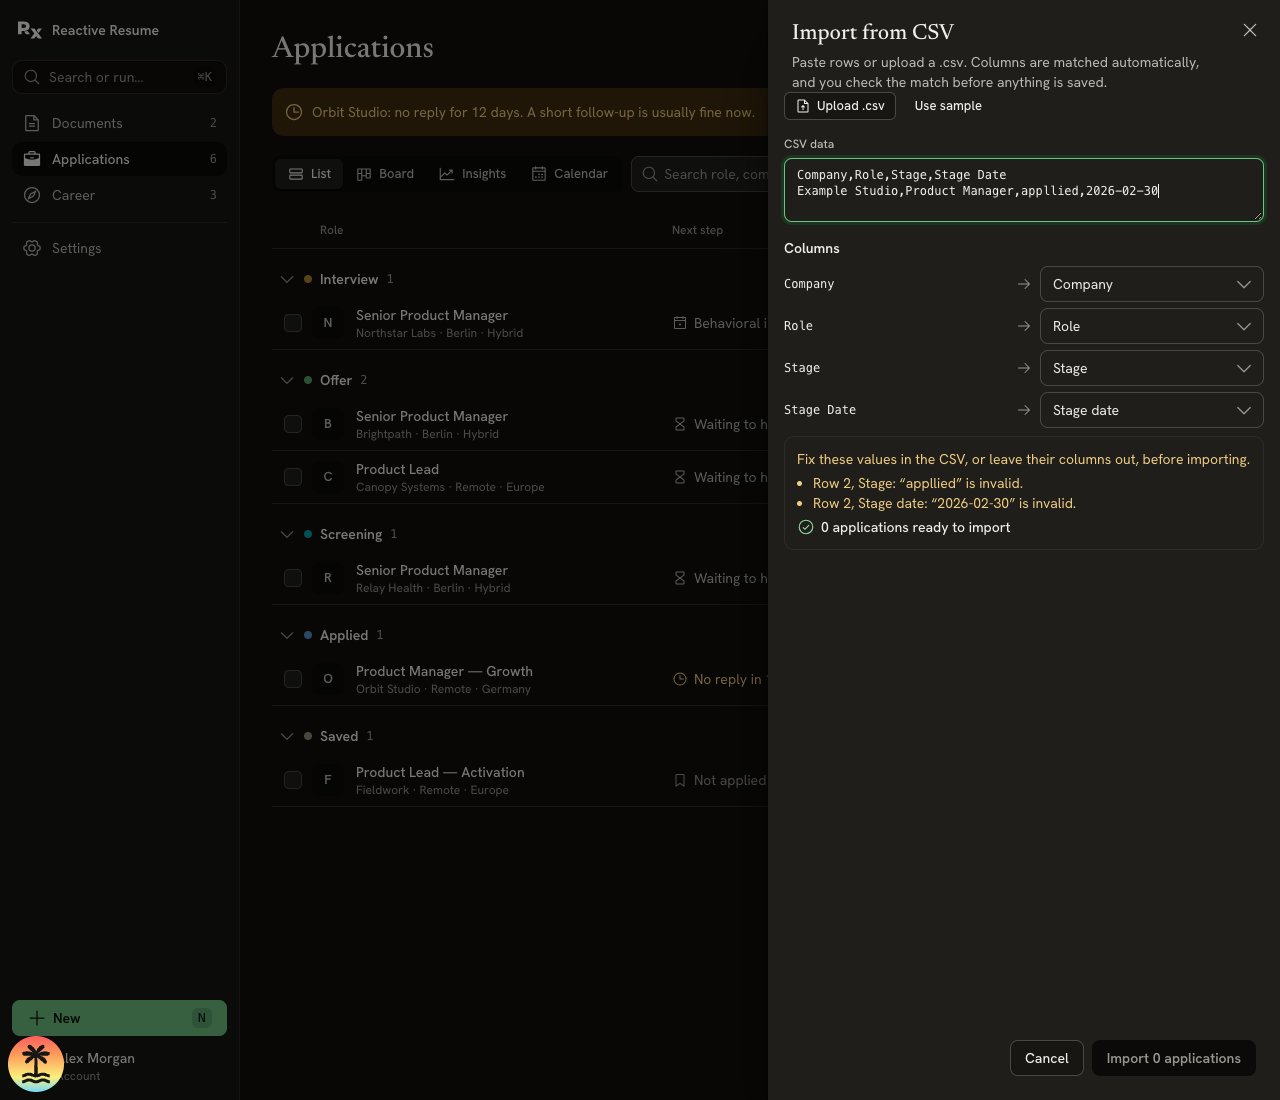
Invalid stages and dates are named by row. Correct the values or deliberately leave out the columns before importing.
Prepare your spreadsheet
Each row becomes one application. Only Company and Role are required; rows missing either are skipped. Select Download them in the summary to get the skipped rows as a CSV file, fix them, and import them again. These are the fields you can match columns to, with the headings that match automatically (capitals and extra spaces don’t matter):
A contact needs a name, and its email must be a valid address. If not, the summary counts it as skipped and the application imports without it.
Here’s a small example:
Import large files
Up to 500 applications import at a time. If your file has more, the summary says how many were left out. Split the file and import the rest separately.Export applications to CSV
1
Open Export to CSV
Select the import/export button, then Export to CSV….
2
Choose what to export
Under Applications to export, choose Current filters (the applications matching your current search, closed
ones included) or All applications (including closed).
3
Limit by date, if you like
Set Application date from and Application date to to export only applications from that period. Leave them
empty to include every date.
4
Download
Check the count of applications to export, then select Download CSV.
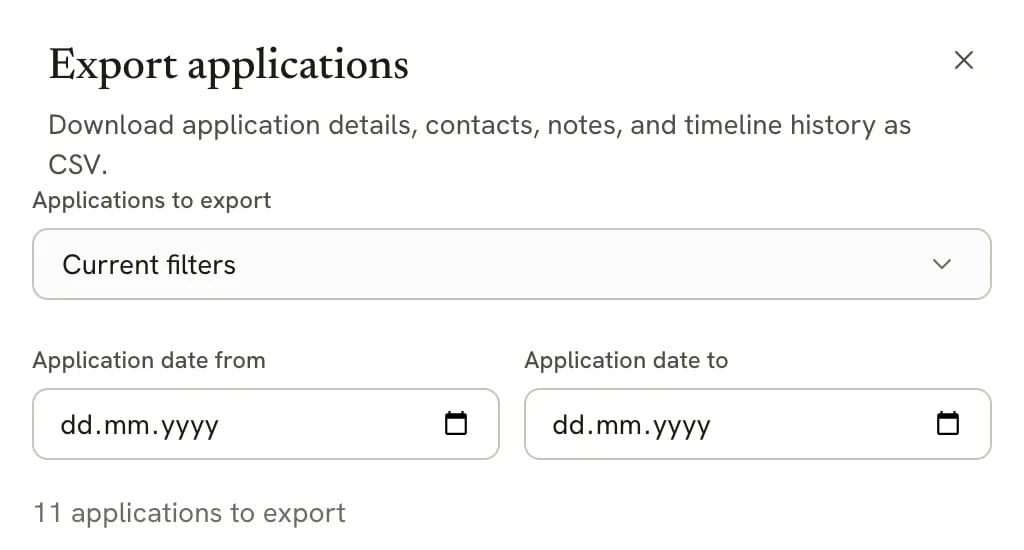
Export options
applications-YYYY-MM-DD.csv and opens in any spreadsheet app. It has these columns: Company, Role, Stage, Stage Date, Application Date, Location, Salary, Source, URL, Tags, Contacts, Notes, Closed Reason, Stage History, Timeline, Created At and Updated At.
You can import an exported file again; most columns match automatically. To download everything in your account, including documents, see Exporting your data.
Troubleshooting
Some rows were skipped
Some rows were skipped
Every row needs a company and a role. Check that those columns are matched under Columns, then fill in the
missing values. Download them gives you the skipped rows.
A column wasn't recognized
A column wasn't recognized
Pick the right field from the column’s menu under Columns, or rename the heading in your file to one from the
table above.
A stage or date didn't import
A stage or date didn't import
Use one of the stage values listed above, and write valid dates as
YYYY-MM-DD, for example 2026-09-02. The error
names the row to correct. You can choose Leave out for a column when you intentionally want its default instead.