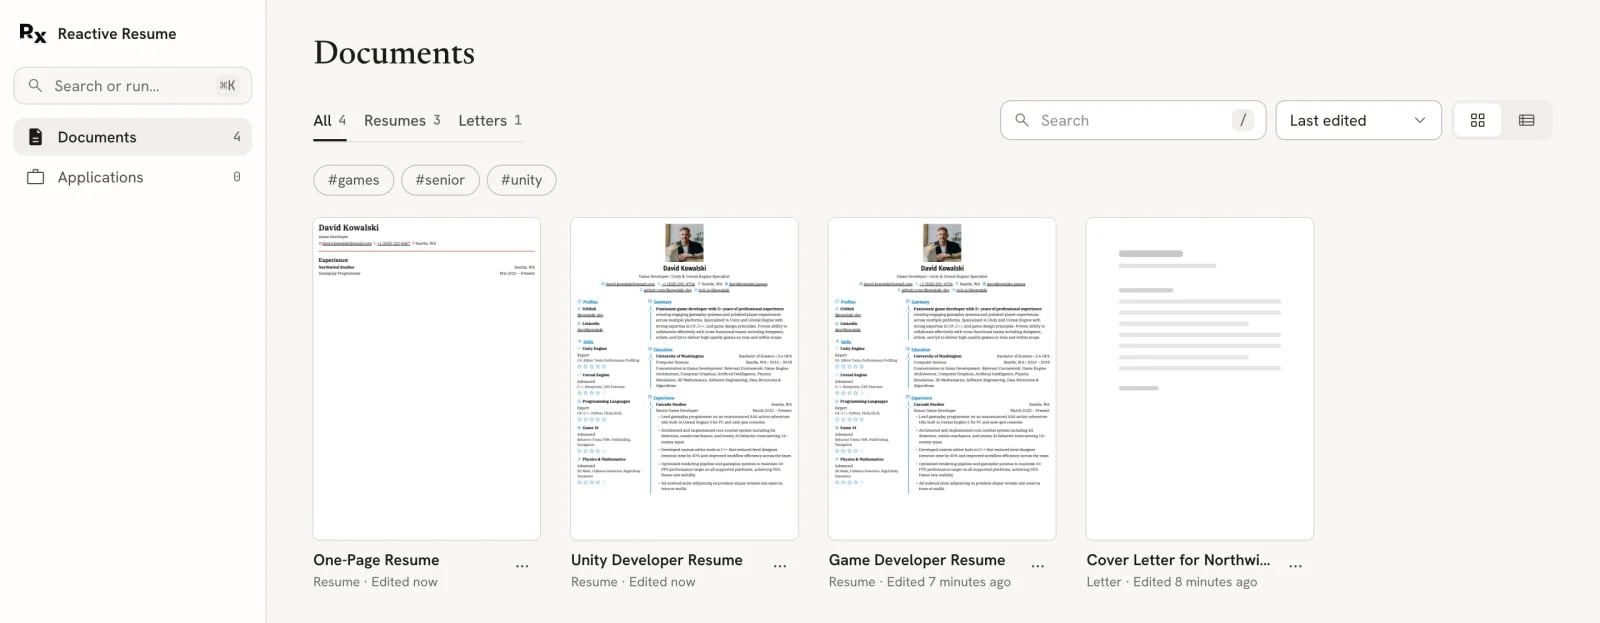
Documents is the page you see after signing in. It holds every resume and cover letter in your account, so you can keep one version per role, company or language and find the right one fast.
The Documents page with All, Resumes and Letters tabs, a search field, a sort menu, grid and list buttons, tag chips, and four document cards

Documents in grid view

Each card shows the document’s first page, its name, its type and when you last edited it. A card made on this device that you haven’t opened yet has a New badge, and a locked document shows a lock icon. If a document is linked to a job application, the company name appears under it.

Open a document

Select a card (or a name in list view) to open it. Resumes open in the resume editor and cover letters in the letter editor. You can also open the card’s ⋯ menu and choose Open.

Find a document

Use the controls above your documents:
The Documents toolbar with All 4, Resumes 3 and Letters 1 tabs, a Search field showing the slash shortcut, a Last edited sort menu, grid and list buttons, and tag chips below

Type tabs, search, sort and view

  • All, Resumes and Letters show one type at a time. Each tab shows how many documents it holds.
  • Search matches document names, tags, and the company or role of a linked application. Press / anywhere on the page to jump to it.
  • The sort menu orders documents by Last edited (the default), Name or Created.
  • Tag chips appear once any document has a tag. See Organizing documents with tags.
If nothing matches, select Clear search and filters to see everything again.
The page address keeps your tab, search, tags and sort, so you can bookmark a filtered view. To search across documents and applications from anywhere in the app, use the command bar.

Switch between grid and list

Use the two buttons at the right of the toolbar. The grid shows page previews. The list is denser, with Name, Type, Application and Edited columns. Reactive Resume remembers your choice on this device.
Documents in list view with columns for Name, Type, Application and Edited, and a menu button at the end of each row

Documents in list view

Use the document menu

Every card and row has a ⋯ menu. You can also right-click a card or row (or press and hold on a touch screen) to open the same menu.
The options menu for Game Developer Resume with Open, Rename, Duplicate, Copy for a job, Tags, Lock editing and Move to Trash

The ⋯ menu for a resume

Rename a document

1

Choose Rename

Open the document’s ⋯ menu and choose Rename. The name turns into a text field with the current name selected.
A document card with its name field in edit mode showing Unity Developer Resume

Renaming a document in place

2

Type the new name

Names can be up to 100 characters.
3

Save or cancel

Press Enter or click elsewhere to save. Press Esc to keep the old name.
A new blank resume takes its name from its headline until you rename it. After you rename it, the name stays as you typed it.

Duplicate a document

Choose Duplicate to make a separate copy. The copy is named “name (copy)” and keeps the original’s tags. The copy appears at the top of the list with a New badge. Editing the copy never changes the original. Duplicating is useful when you want a short and a long version, a version in another language, or a safe place to try a new template.

Copy a resume for a job

Copy for a job… opens the Copy a resume for a job dialog with that resume selected under Start from. Pick an application under For which job? (or No job yet), check the suggested Name, and select Create and open.
The Copy a resume for a job dialog with a list of resumes to start from, a No job yet chip, a Name field and a Create and open button

Copy a resume for a job

When you pick an application, the copy is linked to it and Check uses that job’s posting. The original stays unchanged. The copy opens for manual editing; if you already have a usable AI connection, the assistant also opens with the job’s context. For a saved job, this copy becomes its prepared resume. For the full workflow, see Tailoring a resume for a job.

Lock a document

Choose Lock editing to protect a document you’ve already sent, so it can’t change by accident. While a document is locked:
  • its card shows a lock icon;
  • Rename, Tags…, Link to application… and Move to Trash are unavailable;
  • the editor shows it read-only. In the resume editor a note reads “Locked. Unlock to edit.” with an Unlock button.
You can still open, duplicate and download it. Choose Unlock in the same menu to edit it again.
A resume card with a lock icon and its menu showing Rename, Tags and Move to Trash unavailable and an Unlock item

A locked resume and its menu

Remove a document

Choose Move to Trash. The document leaves Documents right away and a message appears with Undo. Documents stay in Trash for 30 days before they’re deleted for good. See Using the Trash.

Create a new document

Select New in the sidebar, or press N anywhere outside a text field, to open the New document dialog.
The New document dialog with Import a resume, Copy a resume for a job, Start blank, New cover letter instead and Try with a sample resume

The New document dialog

  • Import a resume: build a resume from a PDF, Word, JSON or LinkedIn file. See Importing a resume.
  • Copy a resume for a job: copy one of your resumes, as described above.
  • Start blank: create an empty resume and open it. See Creating your first resume.
  • New cover letter instead: create a letter. It takes your details and design from the resume you edited most recently. See Writing a cover letter.
  • Try with a sample resume: create a filled-in example resume to explore.
You can also drop a file anywhere on the Documents page to import it. When preparing a saved job with no existing resume, select Import or create a resume, then import a file or select Start blank. That resume is linked to the saved job and keeps its posting context. No AI connection is required to create, copy or edit a resume manually.